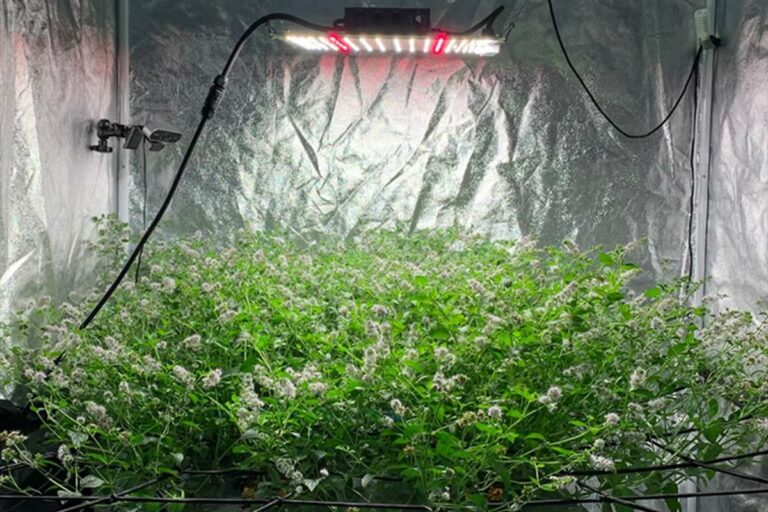
Your exhaust fan setup is one of the most important elements of your indoor garden. Controlling hot temperatures is critical to having success. For a better idea of what kind of light you should be using in your garden, check out the light selector tool, and to figure out what size and type of exhaust fan would be best for your situation, check out the exhaust fan calculator. Just like a good garden design, a good exhaust fan setup can be broken down into a few easy steps. The basic idea is to...
Easy enough...determine where you will exhaust your hot air, then
design your garden so the grow light is conveniently located to the point of exhaust. If the distance
is greater than 20 feet, make sure the fan in your setup can
handle the extra strain. Try to make the run straight from your lights
to the exhaust point, with as few turns as possible.
Since hot air rises, you will be removing much more heat from the garden by starting your exhaust near the ceiling of your garden area. This creates a vacuum that naturally pulls cooler, fresh air into the garden from vents located close to the floor. Use an oscillating fan on the floor to keep the cooler, fresh air moving through the plants and toward the exhaust.
Fans are much more efficient at PULLING air then they are at PUSHING air. With this in mind, the exhaust fan is usually placed right at the point of exhaust. From there it will pull air through your exhaust fan setup (through the light reflector) and out of the garden area.
If your garden is in a tight space, like this example, you may need to
mount your exhaust fan outside the garden area. Keeping your ballast outside the garden area will also help keep the temperature down inside the garden. Any garden in a small space will need a good source of cool air. The front door of a closet can be left open, if the temperature of the air in the larger room is cool enough. Otherwise air conditioning will have to be pumped into the garden, either directly or by fans and ducts.
This is an ideal exhaust run. The intake on the exhaust system (the carbon filter) is up high to catch the hottest air. The exhaust run is straight (no turns) and short, and removes much of the heat from the light before it ever enters the grow room. The grow light needs to be run with it's pane of glass in, otherwise the carbon filter will not benefit from the airflow. If you do not have a carbon filter, simply leave it out of the picture.
If you cannot attach your carbon filter to the ceiling, try to get it as high up in the garden area as possible. Milk crates might come in handy for this. The exhaust setup in this example should be fine. One side note...the examples here are all shown with centrifugal fans. With no carbon filter, these examples would work fine with squirrel cage fans. These fans are covered in more detail on my garden exhaust fans page.
Return to the Garden Design page
Leave the exhaust fan setup page and
Get some Hydroponic System Construction Tips
Check out Homemade Hydroponic System Designs
AffordableGarden Design&Setup
Hi everyone, Jason from Jason's Indoor Guide here. When I got started with hydroponic gardening more than 24 years ago, my first garden used rockwool cubes and B.C. Nutrients....and I remember thinking to myself yeah, sure, there may be a lot of advantages to gardening with hydroponics, for example there are very few pest problems, therefore very little pest control, no weeding, no plowing or tilling the soil, no soil testing or having to add things into the garden soil, no watering the garden....but for someone who just wants to grow their own vegetables and have more control over their food supply and the quality of the food that they eat, the cost of constantly having to buy grow media and hydroponic nutrients makes this an expensive hobby for most people...
I suppose when you take into consideration how much money you save NOT
having to buy food at the grocery store, it is surely cheaper to grow
your own food hydroponically even with the cost of high quality
nutrients. Nevertheless, I didn't have a whole lot of money to work with
and I needed to make my efforts as affordable and effective as
possible....and in the last 24 years I HAVE learned a thing or two!
As you browse through Jason's Indoor Guide, you will notice all of the
systems that I use personally are homemade systems. As I got 3 or 4
years of experience under my belt, I quickly adopted a preference to
standing water systems and systems that use expanded clay pellets or
lava rock, because the media is re-usable and it eliminates a huge
operating expense. So once a hydroponic system is built, garden
maintenance is minimal- check and adjust the nutrient solution daily,
and to change it completely every 2 weeks....and the biggest operating
cost is the hydroponic nutrients. (and the electric bill, lol)...
Homemade Cloner
And, regarding the cost of the nutrients....I experimented for about 3 years with making different compost teas and nutrient teas, but there is still a lot of expense $$$ associated with making high quality nutrient teas....like kelp meal, liquid seaweed, rock dust, bat guano, un-Sulfured molasses, worm castings. You can eliminate a lot of this expense by becoming an expert at making high-quality colloidal humus compost, and use your properly made compost as the basis of your hydroponic nutrient solution.
Unfortunately, I have been gardening for over 24 years and I have only
just recently mastered this difficult skill....and even then, only
because I happened to find a very easy to follow, high quality technique
and decided to follow the instructions to the letter. I produced more
high quality compost in just one week than I was able to use in a whole
year! If you can master the technique, I highly recommend it. It is one of the top 3 things you can do to
increase the productivity of your food production efforts, while at the
same time decreasing the amount of effort required to grow all of your
own food, and decreasing the total cost of operating your food
production system.
And when I say decrease operating costs, I mean decrease them to almost
ZERO, especially if you are producing your own nutrients...
The ultimate solution to eliminate the cost of your hydroponic nutrients: Imagine a hydroponic system that does not require you to buy any nutrients, does not require you to make your own compost, and does not require you to brew your own nutrient tea. Seriously! No cost and no effort as far as providing nutrients to your plants! Plus, at the end of the gardening cycle you harvest all of your garden vegetables, PLUS YOU HARVEST FISH from the system--->
This solution is aquaponics. If you are serious about producing all of your own food and being self-sufficient, this is the ultimate solution for reducing expenses (as much as possible), reducing the total amount of work required, and maximizing the productivity of your gardening efforts. I have been gardening for over 24 years, and it is the perfect food production solution in my opinion.
Besides mastering how to make high quality compost, learning aquaponics is one of the top 3 things you can do to increase your garden productivity, reduce your total costs, and reduce your total work. The product that I learned from is called Aquaponics4you. With all of my hydroponic gardening experience, the first time I came across the Aquaponics4you product I knew immediately that it was something very special! Place an aquaponics system outdoors and use the sun instead of grow lights, and you have reduced every garden expense to nearly ZERO!
The Same System/ 10 Weeks Later!