A Cold Air Problem

by Larry
(Ca)

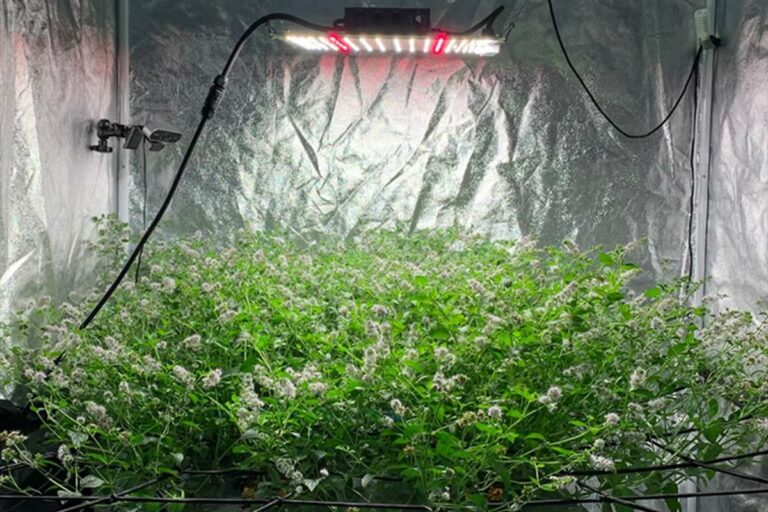
I built a new grow room outside my home. It is very cool and I thought it was ready to go with separate rooms for veg and flowering, a serious exhaust fan built in during construction, and vents for intake the right size. I was looking at this as a builder. Problem is, the flowering room is 9'x 9'x 9' with a 2'x 2' intake vent.

It is cool outside and I have a heater on for temp control, but the exhaust fan sucks in cold air. The air temps are a battle, and I found white powder mold on some of the plants...how do I fix this? you can see me at

paradisehydro.yolasite.com


Answer: Larry- I must say, I am very impressed by your grow room project. Excess heat is so often a problem in grow rooms, many people don't realize that too little heat can also be a big problem. There is no doubt the cool temperatures are causing (or at least contributing to) your problem with the powdery mildew.

First thing- if your 2'x 2' air intake vent is "always open" to the outside, such as a louver style vent, you may want to modify it for use during the cooler months. Discount Hydroponics has a 6 inch intake vent with a "shut off" flap and a solenoid- the solenoid controls the opening and closing of the flap in the intake and is wired to the thermostat controlling your exhaust fan. The flap is normally closed, except when your exhaust fan kicks on (at which point the solenoid opens the flap to allow air intake during the exhaust cycle).

I noticed in the video that your grow room is insulated. This is a plus. When HID lights are left on inside an insulated, enclosed space, it should lead to steadily increasing temperatures. You have a lot of air space in your grow room, so this might take a while to warm up when the lights first kick on. Obviously, once the lights go out for the night you may need an alternate source of heat (such as your heater) if it is cool outside. While your lights are on, however, you may be able to get away without using it. The key is how you manage your ventilation.

Ventilation in a grow room serves a few purposes. Removing old air (and bringing in new) usually lowers the temperature in the garden, lowers the humidity in the garden, and keeps the CO2 levels in the room from dropping to a point where the plant growth stops. If you are NOT supplementing with CO2, you should indeed exchange the air in your grow room from time to time. Other than that, there is no reason to run your exhaust fan unless the temperature at plant level goes above 75 or 80 degrees.

If the humidity goes above 60 or 65 percent, you may also want to run the exhaust fan....but there are other options for controlling humidity than running your exhaust fan. Warmer air can hold much more water vapor than cooler air, so as the temperature in your grow room warms up (to where it should be) you should notice the humidity coming down a little bit.

When your lights go off for the night, the opposite is true- as the air temp cools, it can no longer hold as much water vapor....the humidity begins to rise until the air in the room is completely saturated and the only place for the water vapor to go is to condensate out of the air and onto the plants and walls. This action shortly after "lights out" may also be contributing to your powdery mildew.

The other option for controlling the effects of humidity (besides exhausting the grow room) is to increase the air movement around the plants. Plants can tolerate higher and higher humidity levels without any ill effects as long as the air movement in and around the plants becomes more and more vigorous. In a way, the increase in humidity hampers the plants ability to breathe normally, while the increased air circulation helps the plants breathe a little easier.

For the time being, let's assume that you will not have any problems with humidity as long as you get your temperature up and increase your air circulation around the plants (a couple of 12 inch oscillating fans should work nicely). Let's also assume that CO2 will not be a huge problem because you have a lot of air space in your grow room....and also because every building "breathes", or slowly exchanges it's air with the outside. So (for the moment) the only reason you should need to run your exhaust fan is if the temperature in your grow room becomes too high.

Now, put your exhaust fan on a thermostat and set it to kick on whenever the temperature under the lights (at plant level) reaches 75 or 78 degrees. Since you are fighting the coldness, it is ok to let the temperature go to 78 degrees before you kick the exhaust fan on (in the summer, that will be a different story). This is the big test- hopefully, with your lights on, the temperature in your grow room will climb slowly to the point where your exhaust fan kicks on....or at least to the point where it keeps the room between 65 and 75 degrees.

Your thermostat should be set to shut off the exhaust fan once temperatures drop to 65 or 68 degrees. Any time temperatures drop below 65 degrees, you will need to run your heater to maintain 65 degrees in the grow room. This will likely be the case when the lights are out, during the first hour or two after your lights kick on, or whenever it gets really cold outside and the heat from your lights is just not enough to warm the space.

Assuming the veg area is also lit by HID light, and assuming both the veg AND flowering areas are exhausted simultaneously by the same big exhaust fan, there is only one other suggestion I can make in regards to your situation....during cooler months you may want to re-circulate air back and forth between the veg area and the flowering area. The heat from the veg area can be used to warm the flowering area (somewhat) when the lights are off in the flowering area, and having the veg area and the flowering area at the same temperature will prevent you from having additional HVAC problems in your grow room....or worse yet, having to run two separate systems because your veg area is always a different temp than your flowering area.

I sure hope this helps you out Larry- and Happy Growing!

Click here to post comments

Join in and write your own page! It's easy to do. How? Simply click here to return to Temp & Humidity Control Q&A.

All of the items that I personally use and recommend!

AffordableGarden Design&Setup

(10 week update below)


Find out the cheapest and easiest ways to garden productively in this article.

Hi everyone, Jason from Jason's Indoor Guide here. When I got started with hydroponic gardening more than 24 years ago, my first garden used rockwool cubes and B.C. Nutrients....and I remember thinking to myself yeah, sure, there may be a lot of advantages to gardening with hydroponics, for example there are very few pest problems, therefore very little pest control, no weeding, no plowing or tilling the soil, no soil testing or having to add things into the garden soil, no watering the garden....but for someone who just wants to grow their own vegetables and have more control over their food supply and the quality of the food that they eat, the cost of constantly having to buy grow media and hydroponic nutrients makes this an expensive hobby for most people...


Epic Nutrient Change


I suppose when you take into consideration how much money you save NOT having to buy food at the grocery store, it is surely cheaper to grow your own food hydroponically even with the cost of high quality nutrients. Nevertheless, I didn't have a whole lot of money to work with and I needed to make my efforts as affordable and effective as possible....and in the last 24 years I HAVE learned a thing or two!

As you browse through Jason's Indoor Guide, you will notice all of the systems that I use personally are homemade systems. As I got 3 or 4 years of experience under my belt, I quickly adopted a preference to standing water systems and systems that use expanded clay pellets or lava rock, because the media is re-usable and it eliminates a huge operating expense. So once a hydroponic system is built, garden maintenance is minimal- check and adjust the nutrient solution daily, and to change it completely every 2 weeks....and the biggest operating cost is the hydroponic nutrients. (and the electric bill, lol)...


Homemade Cloner


And, regarding the cost of the nutrients....I experimented for about 3 years with making different compost teas and nutrient teas, but there is still a lot of expense $$$ associated with making high quality nutrient teas....like kelp meal, liquid seaweed, rock dust, bat guano, un-Sulfured molasses, worm castings. You can eliminate a lot of this expense by becoming an expert at making high-quality colloidal humus compost, and use your properly made compost as the basis of your hydroponic nutrient solution.

Unfortunately, I have been gardening for over 24 years and I have only just recently mastered this difficult skill....and even then, only because I happened to find a very easy to follow, high quality technique and decided to follow the instructions to the letter. I produced more high quality compost in just one week than I was able to use in a whole year! If you can master the technique, I highly recommend it. It is one of the top 3 things you can do to increase the productivity of your food production efforts, while at the same time decreasing the amount of effort required to grow all of your own food, and decreasing the total cost of operating your food production system.

And when I say decrease operating costs, I mean decrease them to almost ZERO, especially if you are producing your own nutrients...


High Efficiency
Hydroponics

The ultimate solution to eliminate the cost of your hydroponic nutrients: Imagine a hydroponic system that does not require you to buy any nutrients, does not require you to make your own compost, and does not require you to brew your own nutrient tea. Seriously! No cost and no effort as far as providing nutrients to your plants! Plus, at the end of the gardening cycle you harvest all of your garden vegetables, PLUS YOU HARVEST FISH from the system--->

Aquaponics

Click Here to learn more!

This solution is aquaponics. If you are serious about producing all of your own food and being self-sufficient, this is the ultimate solution for reducing expenses (as much as possible), reducing the total amount of work required, and maximizing the productivity of your gardening efforts. I have been gardening for over 24 years, and it is the perfect food production solution in my opinion.


Produce garnden vegetables AND fish together. Eliminate fertilizer costs!

Besides mastering how to make high quality compost, learning aquaponics is one of the top 3 things you can do to increase your garden productivity, reduce your total costs, and reduce your total work. The product that I learned from is called Aquaponics4you. With all of my hydroponic gardening experience, the first time I came across the Aquaponics4you product I knew immediately that it was something very special! Place an aquaponics system outdoors and use the sun instead of grow lights, and you have reduced every garden expense to nearly ZERO!


The Same System/ 10 Weeks Later!


If you've found this site helpful at all, I would really appreciate it