by Fred
(Exeter, NH)
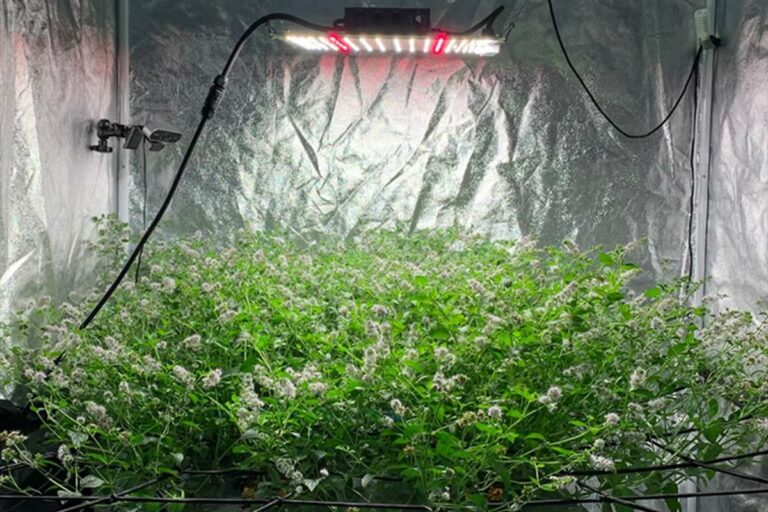
My question is basically: What am I doing wrong? I have an indoor grow box that is 2ftx2ftx3ft, with 200 watts of cfl's, now I have germinated my seeds in a sacket, till they were about 1 inch covered in the dark on a heat pad. From there they went into a 1 gallon pot under the lights. My grow box is 80 degrees and 35% humidity. The plants always die. I've had 5 failed attempts. Do I have to much light? Any tips will be helpful. I'm frustrated and have spent a LOT of money so far with bad results. I'm growing with top of the line soil, and my water is distilled and left out over night. The box is well vented and wrapped in mylar. If you could give me instructions on what to do after the seed has spiked about 1/8 of an inch....how much water to add to the soil and how often. Thank you very much!
Answer: Fred, let me assume for one moment that your grow box is 3 feet high. With 2'x 2' of garden area lit by 200 watts of compact fluorescent light, your garden is lit at 50 watts per square foot. That is pretty much ideal in my opinion. 80 degrees is a little warm. Air exhaust, as well as air circulation inside the box, are both important and should not be overlooked. 70-75 degrees would be closer to ideal as far as temperature is concerned. If you are growing in Spring or Summer, I would say DON'T use the heating pad!
It is also very easy to over-water new seedlings, and I suspect this is where you may be going wrong. Especially if you have used a high quality soil mix with some nutrients in it, as you have indicated, then your problem is almost certainly a watering issue.
A seedling one inch tall will have a tap root also one inch long. Once transplanted into the one gallon pot, you have a very large container of soil with NO roots in it. If you water all of this soil, and there are no roots in the soil to use the water, then the soil tends to stay wet longer than it should. If you water the soil again (before drying in between) you stand a very good chance of water-logging the soil.
Water-logging is when all of the air spaces in the soil have been replaced by standing water within the soil. Unfortunately, nutrient uptake ONLY takes place in the presence of Oxygen....so you must maintain a certain level of Oxygen in the root zone and water-logged soil is not acceptable.
Having struggled with the same problem myself while learning to grow in soil, I can offer a couple of tips. The first is to use more light weight, fast draining soil additives in your mix. A mix with too much peat moss, or too much coconut coir, begins to take on a dense consistency like rockwool....which is not good for a soil mix. It will hold too much water.To improve the drainage of the mix, include more perlite, vermiculite, pumice, or expanded clay pellets. This will help the soil retain more Oxygen even if a little over-watered. To prevent over-watering, use a hand pump spray mist bottle to moisten the new transplant for the next several days (instead of watering the soil).
My second tip was what saved me personally. When transplanting a plant into a new container, make sure the new container is the right size. Specifically, make sure the new container is NOT TOO LARGE. A seedling started in a 4 oz dixie cup can be transplanted comfortably into a 6 inch round pot....which in turn can be transplanted into a 3 gallon container once it is again root bound. A root-bound plant in a dixie cup should NOT be transplanted into one gallon container. A slightly smaller in-between size would be more appropriate.
Finally, whenever transplanting into a larger container, you should pre-moisten the soil you are using. Then, water the freshly transplanted plant with a minimum amount of water, directed to the soil where you know the original roots to be. Make a conscious effort to check the soil for moisture before you water the plant again....touch the top 1" of the soil with your finger....it should be dry. Lift the container....it should be much lighter. For a fresh transplant, this could be 10 or even 14 days! So be patient, and an eye on your plants every day so you are ready when they are!
Don't forget that air circulation, and Happy Growing!
AffordableGarden Design&Setup
Hi everyone, Jason from Jason's Indoor Guide here. When I got started with hydroponic gardening more than 24 years ago, my first garden used rockwool cubes and B.C. Nutrients....and I remember thinking to myself yeah, sure, there may be a lot of advantages to gardening with hydroponics, for example there are very few pest problems, therefore very little pest control, no weeding, no plowing or tilling the soil, no soil testing or having to add things into the garden soil, no watering the garden....but for someone who just wants to grow their own vegetables and have more control over their food supply and the quality of the food that they eat, the cost of constantly having to buy grow media and hydroponic nutrients makes this an expensive hobby for most people...
I suppose when you take into consideration how much money you save NOT
having to buy food at the grocery store, it is surely cheaper to grow
your own food hydroponically even with the cost of high quality
nutrients. Nevertheless, I didn't have a whole lot of money to work with
and I needed to make my efforts as affordable and effective as
possible....and in the last 24 years I HAVE learned a thing or two!
As you browse through Jason's Indoor Guide, you will notice all of the
systems that I use personally are homemade systems. As I got 3 or 4
years of experience under my belt, I quickly adopted a preference to
standing water systems and systems that use expanded clay pellets or
lava rock, because the media is re-usable and it eliminates a huge
operating expense. So once a hydroponic system is built, garden
maintenance is minimal- check and adjust the nutrient solution daily,
and to change it completely every 2 weeks....and the biggest operating
cost is the hydroponic nutrients. (and the electric bill, lol)...
Homemade Cloner
And, regarding the cost of the nutrients....I experimented for about 3 years with making different compost teas and nutrient teas, but there is still a lot of expense $$$ associated with making high quality nutrient teas....like kelp meal, liquid seaweed, rock dust, bat guano, un-Sulfured molasses, worm castings. You can eliminate a lot of this expense by becoming an expert at making high-quality colloidal humus compost, and use your properly made compost as the basis of your hydroponic nutrient solution.
Unfortunately, I have been gardening for over 24 years and I have only
just recently mastered this difficult skill....and even then, only
because I happened to find a very easy to follow, high quality technique
and decided to follow the instructions to the letter. I produced more
high quality compost in just one week than I was able to use in a whole
year! If you can master the technique, I highly recommend it. It is one of the top 3 things you can do to
increase the productivity of your food production efforts, while at the
same time decreasing the amount of effort required to grow all of your
own food, and decreasing the total cost of operating your food
production system.
And when I say decrease operating costs, I mean decrease them to almost
ZERO, especially if you are producing your own nutrients...
The ultimate solution to eliminate the cost of your hydroponic nutrients: Imagine a hydroponic system that does not require you to buy any nutrients, does not require you to make your own compost, and does not require you to brew your own nutrient tea. Seriously! No cost and no effort as far as providing nutrients to your plants! Plus, at the end of the gardening cycle you harvest all of your garden vegetables, PLUS YOU HARVEST FISH from the system--->
This solution is aquaponics. If you are serious about producing all of your own food and being self-sufficient, this is the ultimate solution for reducing expenses (as much as possible), reducing the total amount of work required, and maximizing the productivity of your gardening efforts. I have been gardening for over 24 years, and it is the perfect food production solution in my opinion.
Besides mastering how to make high quality compost, learning aquaponics is one of the top 3 things you can do to increase your garden productivity, reduce your total costs, and reduce your total work. The product that I learned from is called Aquaponics4you. With all of my hydroponic gardening experience, the first time I came across the Aquaponics4you product I knew immediately that it was something very special! Place an aquaponics system outdoors and use the sun instead of grow lights, and you have reduced every garden expense to nearly ZERO!
The Same System/ 10 Weeks Later!