Garden Fan on a Timer

by Jerry Morse
(vicksburg, MS USA)

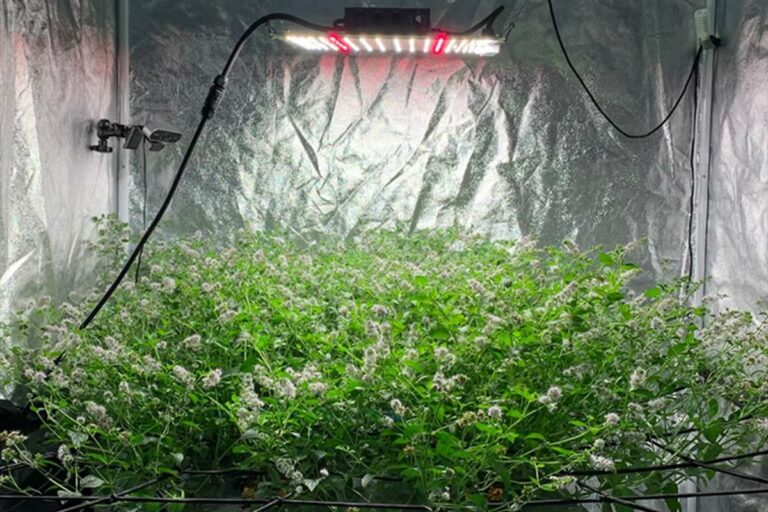
I have an oscillating fan to blow on my indoor tomato plant, it is under a hydrofarm combo HPS & MH light system. 600 & 400 watt respectively. I have a timer for the fan. How much time out of each hour should the fan be on? What is a light mover? What are the advantages of a light mover? How much does a light mover cost?


Answer: An oscillating fan should be kept on 24 hours a day in my opinion. There are several reasons for this, which I get into in more detail about on my troubleshooting humidity page. In short, it helps your plants to breathe properly.

While your grow lights are on, the exhaust fan is used mainly to keep the temperature from getting too high (above 80*F). How long you have to run your exhaust fan for each hour will depend completely on the temperature inside the grow room. It is not unusual to have an exhaust fan on constantly whenever the lights are on. In fact, this may be your best strategy.

If you are pulling cold air into the grow room from outside (in December, for example), you may find that running the exhaust fan constantly makes the garden area too cold (65*F or less). I have run into this problem before myself. My solution was to re-circulate the air inside the grow room, adding only enough fresh air from outside to keep the temperature under control.

Keep in mind your plants are constantly using CO2 to grow. In a closed grow room with re-circulated air, the fresh air you introduce also becomes an important source of fresh CO2. If CO2 levels become too low all plant growth will stop, no matter how bright your lights are or how well you are feeding them.

Another way to control the temperature would be to time how long it takes for your garden to warm up to 80*F once the lights kick on. At that point, turn your exhaust fan on and measure how long it takes to bring the garden area back down to the 68*F-72*F range. This will give you a good idea how often you need to turn your exhaust fan on, and how long you need to leave it on for each time.

The third way to control temperature would be to plug your exhaust fan into a thermostat that will automatically turn your fan on when it gets to a certain temperature, and automatically turn it off when the room has cooled to a certain temperature. I admit, these devices are more expensive than a digital timer (about $60.00), but they take some of the legwork out of the exhaust fan setup.

When your grow lights go off for the night, the humidity will go up in the grow room. Humidity can cause all kinds of problems if it is too high, mainly with plant killing fungus and mildew. To prevent these problems, you will want to turn your exhaust fan on and completely exhaust the air volume inside the garden area once an hour. Directions on how to calculate this exhaust period can be found on my exhaust fan calculator page.

A light mover is a motorized device that moves your grow lights back and forth a few feet over your garden. A stationary light will always cast a shadow on the same leaves of your plants. By moving the light back and forth, you actually activate more leaf surfaces to photosynthesize (and so get a little more growth). Also, a 1000 watt grow light is capable of covering a garden area of 4'x 8' with good results (on a light mover).

Without a light mover, however, the light must be hung in one spot. As you pack plants into a more square 5'x 6' area, the plants on the perimeter of the garden will always get considerably less light than the ones in the center. If you are gardening plants in individual containers, you could switch them around every day to even things out. When all of your plants are plugged into a hydroponic system, however, this is not usually an option. One thing you can do is make sure your shortest plants are in the center of the system, with your tallest plants at the edges of the garden.

A light mover costs about $200.00. If this is your first garden, I would suggest making the setup as simple as possible at first. Definitely use reflective material around the perimeter of your garden to make the best use of the light. Once you have the garden environment dialed in (especially temperature) and you are producing excellent results, than go ahead and add a light mover if you want to try to maximize your yields.

Click here to post comments

Join in and write your own page! It's easy to do. How? Simply click here to return to Temp & Humidity Control Q&A.

All of the items that I personally use and recommend!

AffordableGarden Design&Setup

(10 week update below)


Find out the cheapest and easiest ways to garden productively in this article.

Hi everyone, Jason from Jason's Indoor Guide here. When I got started with hydroponic gardening more than 24 years ago, my first garden used rockwool cubes and B.C. Nutrients....and I remember thinking to myself yeah, sure, there may be a lot of advantages to gardening with hydroponics, for example there are very few pest problems, therefore very little pest control, no weeding, no plowing or tilling the soil, no soil testing or having to add things into the garden soil, no watering the garden....but for someone who just wants to grow their own vegetables and have more control over their food supply and the quality of the food that they eat, the cost of constantly having to buy grow media and hydroponic nutrients makes this an expensive hobby for most people...


Epic Nutrient Change


I suppose when you take into consideration how much money you save NOT having to buy food at the grocery store, it is surely cheaper to grow your own food hydroponically even with the cost of high quality nutrients. Nevertheless, I didn't have a whole lot of money to work with and I needed to make my efforts as affordable and effective as possible....and in the last 24 years I HAVE learned a thing or two!

As you browse through Jason's Indoor Guide, you will notice all of the systems that I use personally are homemade systems. As I got 3 or 4 years of experience under my belt, I quickly adopted a preference to standing water systems and systems that use expanded clay pellets or lava rock, because the media is re-usable and it eliminates a huge operating expense. So once a hydroponic system is built, garden maintenance is minimal- check and adjust the nutrient solution daily, and to change it completely every 2 weeks....and the biggest operating cost is the hydroponic nutrients. (and the electric bill, lol)...


Homemade Cloner


And, regarding the cost of the nutrients....I experimented for about 3 years with making different compost teas and nutrient teas, but there is still a lot of expense $$$ associated with making high quality nutrient teas....like kelp meal, liquid seaweed, rock dust, bat guano, un-Sulfured molasses, worm castings. You can eliminate a lot of this expense by becoming an expert at making high-quality colloidal humus compost, and use your properly made compost as the basis of your hydroponic nutrient solution.

Unfortunately, I have been gardening for over 24 years and I have only just recently mastered this difficult skill....and even then, only because I happened to find a very easy to follow, high quality technique and decided to follow the instructions to the letter. I produced more high quality compost in just one week than I was able to use in a whole year! If you can master the technique, I highly recommend it. It is one of the top 3 things you can do to increase the productivity of your food production efforts, while at the same time decreasing the amount of effort required to grow all of your own food, and decreasing the total cost of operating your food production system.

And when I say decrease operating costs, I mean decrease them to almost ZERO, especially if you are producing your own nutrients...


High Efficiency
Hydroponics

The ultimate solution to eliminate the cost of your hydroponic nutrients: Imagine a hydroponic system that does not require you to buy any nutrients, does not require you to make your own compost, and does not require you to brew your own nutrient tea. Seriously! No cost and no effort as far as providing nutrients to your plants! Plus, at the end of the gardening cycle you harvest all of your garden vegetables, PLUS YOU HARVEST FISH from the system--->

Aquaponics

Click Here to learn more!

This solution is aquaponics. If you are serious about producing all of your own food and being self-sufficient, this is the ultimate solution for reducing expenses (as much as possible), reducing the total amount of work required, and maximizing the productivity of your gardening efforts. I have been gardening for over 24 years, and it is the perfect food production solution in my opinion.


Produce garnden vegetables AND fish together. Eliminate fertilizer costs!

Besides mastering how to make high quality compost, learning aquaponics is one of the top 3 things you can do to increase your garden productivity, reduce your total costs, and reduce your total work. The product that I learned from is called Aquaponics4you. With all of my hydroponic gardening experience, the first time I came across the Aquaponics4you product I knew immediately that it was something very special! Place an aquaponics system outdoors and use the sun instead of grow lights, and you have reduced every garden expense to nearly ZERO!


The Same System/ 10 Weeks Later!


If you've found this site helpful at all, I would really appreciate it